

Create an API key
- Open Admin and select API keys in the sidebar, or click Manage API keys from the Console.
- Click New API key.
- Choose the workspace the key will act on. A key never has access to more than one workspace, so sandbox and live environments always use different keys.
- Give the key a name for future reference and, optionally, a description of its use case.
- Tick the permissions the key needs for each service (see Permissions below).
- Click Create API key.
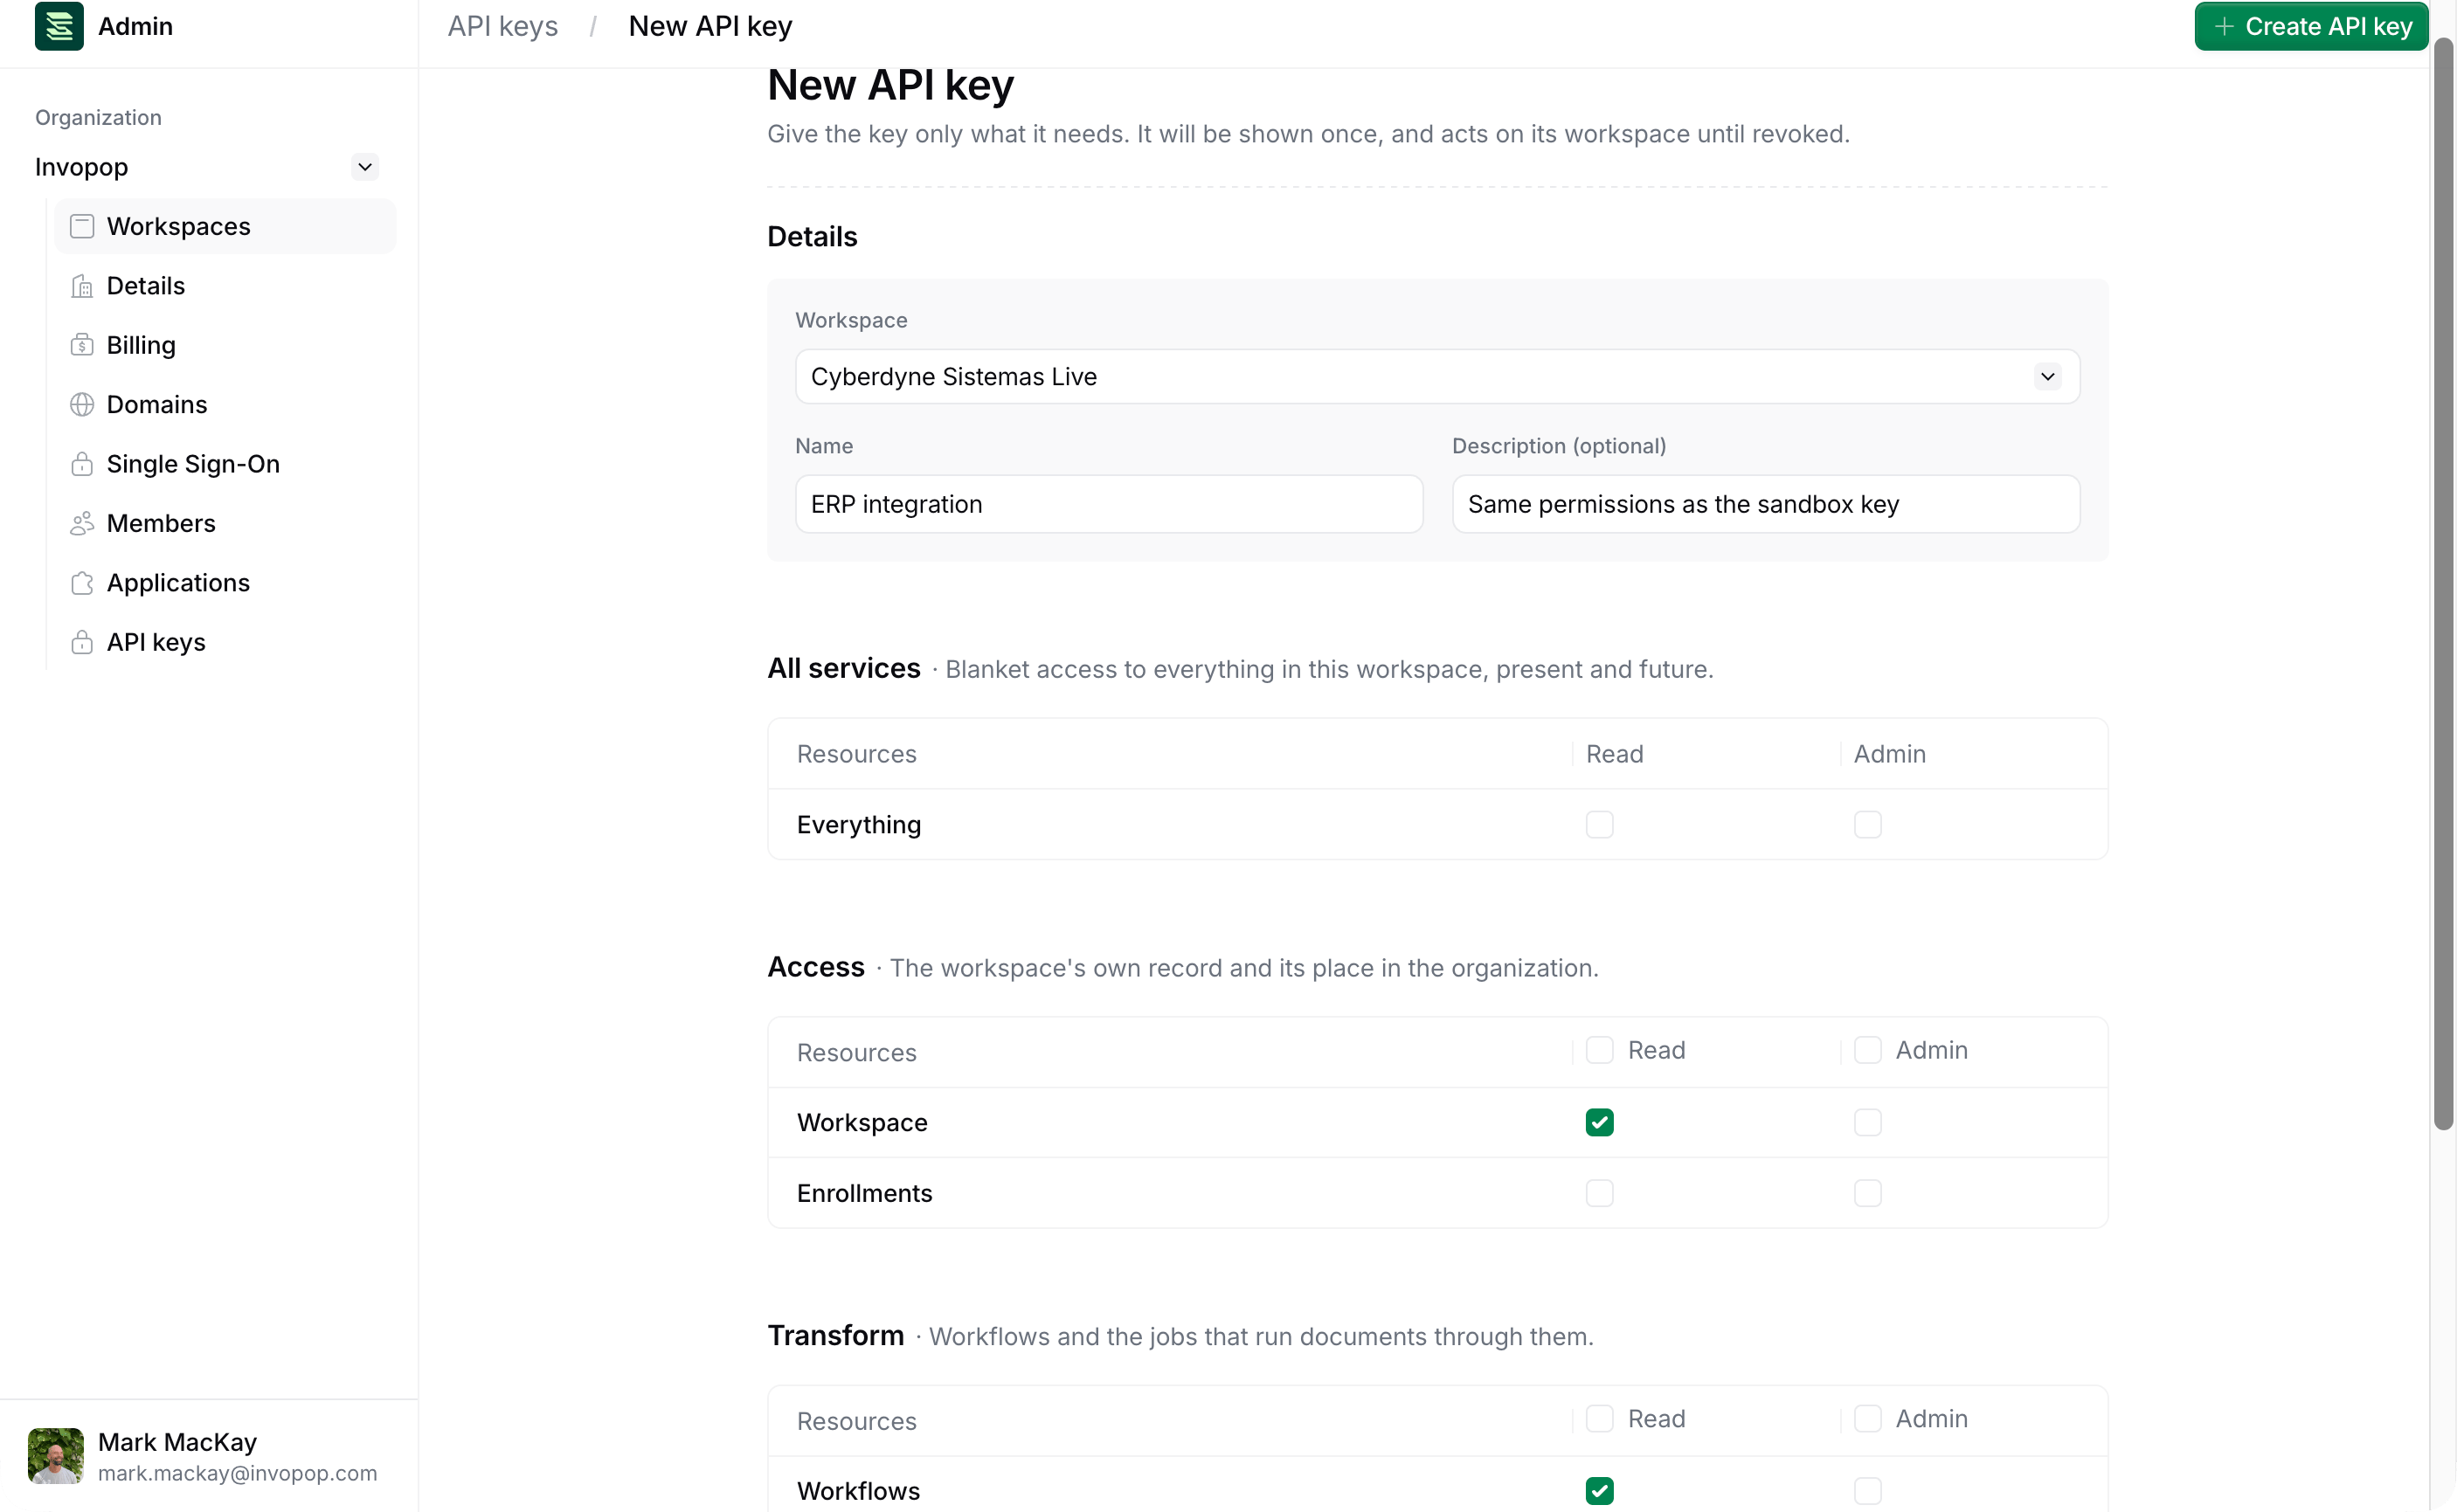
Permissions
Permissions are granted per service and per resource. Each resource has two checkboxes:- Read allows the key to list and fetch the resource.
- Admin allows the key to create, update and delete the resource as well as read it.
Give each key only what it needs. A key that only submits invoices needs Admin on Silo entries and Transform jobs, and nothing else. A reporting or monitoring integration usually needs Read only. Use All services only for keys that genuinely need to do everything, such as a full back-office integration.
The Admin list groups every key by workspace, with separate sections for live and sandbox workspaces, and shows the permission level of each key: admin, read, or No permissions for a key with nothing ticked. Review this list periodically and revoke keys that are no longer in use.
Use the token
Tokens must be included in theAuthorization HTTP header in all requests as a type Bearer.
Test everything is working correctly using the ping
endpoint and curl: